Table of Contents Show
Making a wood dining room table may sound like a huge undertaking, but when broken down into steps that are easy to follow, even a novice with a bit of time on their hands can build a table to be proud of.
With this easy DIY dining table step-by-step article, we start with choosing the best wood, then move on to making the tabletop, frame, and legs. If time and money aren’t on your side, we have a cheat guide too.
Easy DIY Dining Table, How to Make a Wooden Dining Room Table
Read Also:
Choose Your Wood
Choosing wood when making a wood dining room table is a little down to personal preference, and a lot down to your budget. Good wood options for dining tables are:
- Oak
- Cherry
- Maple
- Redwood
- Birch
However, if you can’t find the wood you’re really after, you can always choose a less expensive option, and add a suitable stain when you’re done to create the illusion of a more expensive piece of wood. A list of other woods you might want to consider, along with their advantages and disadvantages, can be found in our article on how to build wood countertops.
For the purposes of this exercise, we are going to make a butcher block-style dining table, as it is an easier and less cumbersome process. You may also want to bear this in mind when shopping around for wood.
You can, of course, cut your wood down to size when you get home, but if you can get the store or lumber yard to do it for you, all the better. If you can also get hold of quarter-sawn timber then do so, as it provides more stability.
Make the Table Top
A standard dining room table is around 6 feet by 4 feet, but make sure to measure the available space in your dining room and adjust these measurements accordingly.
When creating a butcher’s block top, it is easier to work in small numbers than to try and glue together 20+ pieces in one go. With your butcher block strips already cut, work how many strips you need to make up the width of your table.
In this example we will say our strips are 2 inches, so we will need 24 strips of wood measuring at least 6 feet. When it comes to cutting your strips to length, it is worth adding at least an extra 1/16 inch, to make sure of a neat finish with room to plane/sand everything to the same length at the end.
As we are working to a width of 4 feet, we will split each section down into 1-foot sections, so begin by gluing the edges of 6 strips of wood with wood/carpenter glue. Align up your strips, and use clamps to keep them in place. After 30 minutes, wipe off any excess glue.
Once dry, you can remove the clamps and repeat the process, until you have all 4 sections glued together. Now put all of these sections together, joining each section to the other, again with wood glue. Try to match up the lengths as best you can, before clamping the whole lot and waiting for the glue to dry.
You can now hand plane the edges of the table, to give a neat finish to the ends, and finish off by planning and then sanding the tabletop.
Make the Table Legs & Frame
The standard height measurement to bear in mind when learning how to make a dining room table is between 29-31 inches. If we make allowances for joining the legs to the tabletop, that then gives us about 27-30 inches of length needed for each table leg – making them a little longer is better, as they can be easily cut down to size later.
How thick you make the legs, is obviously dependent on your chosen style, and how big the table is – the bigger the table, the more sturdy the legs will need to be. If the table is really quite big (over 6 feet in length), then you may need to think about adding 6 legs, rather than 4.
Buying appropriate lengths of 4×4 timber will make the process of making table legs easy. Once cut to length, they can be joined to the frame.
The frame of your table should be the dimensions of your tabletop, less than 6 inches for each measurement – then take off the width of your table legs x2. If we are using 4×4 for the legs, then your frame pieces will be 14 inches less for each piece, than the tabletop measurements.
A simple frame again, made with 4×4 is a simple enough job, making sure you leave the corners open to fit the legs into. Then you can adjoin the legs at each corner, and once you’ve established it’s not going to wobble – you can add your beautiful tabletop over the frame, and legs that should support it superbly.
A Cheat’s Guide to Building a Wooden Table
You could, of course, make life easier for yourself and create a new table from existing products. Why not skip the section on making the table legs completely and just make a new wooden tabletop for your dining room, affixing it onto an existing table?
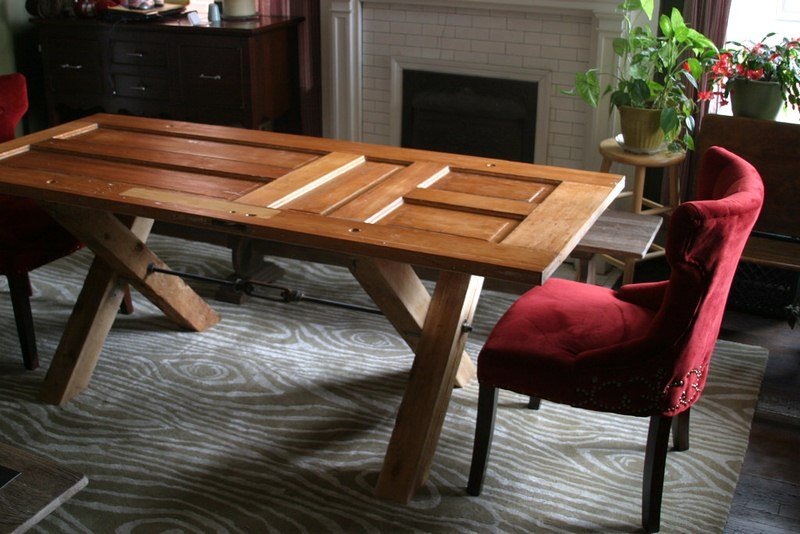
Or, be really ingenious (and eco-friendly), by reusing a wooden door to make a dining room table, and use the door as your tabletop – either make legs and a simple frame (as above) or again, affix the door to an existing piece of furniture.
Finishing & Protecting
Whichever method you choose to use to make a dining room table, you will need to make sure it is finished off and protected properly before it can be used.
Renting an orbital sander is a less-exhausting way of ensuring a smooth finish to your table, as well as offering superior results when compared with using sandpaper alone. Always make sure to sand with the grain, to get the smoothest finish possible.
When it comes to protecting your wooden dining table, the choice is yours, whether you use wax, oil, or a varnish. If you oil a table, you will continue to need to ‘feed‘ your table, a couple of times a year, varnishing won’t need doing again for years unless you want to, and waxing is easy to spot-finish when needed.
Try your chosen material underneath the table, or inside a table, leg to see how it comes out, as often the results can be darker than you think, even if you are using a clear varnish.
Once the finish is dry, you are free to enjoy many meals at the wood dining room table you made yourself.
References
- https://www.doityourself.com/stry/build-a-butcher-block-table-top
- https://www.housesumo.com/diy-faux-butcher-block-countertops/
- Popular Mechanics, Jan 1985
- Make it! don’t Buy It: home furnishings and Accessories to make with Wood by John Warde, 1983


