Table of Contents Show
Introduction
A sturdy and well-assembled bed frame is crucial for a good night’s sleep. Without proper support, your mattress won’t provide the comfort it should, leading to restless nights and potential back issues.
Building your own bed frame not only saves money but also offers personal satisfaction. You control every aspect of the assembly, ensuring that each piece is securely in place. This DIY project can transform your bedroom without breaking the bank.
In this guide, we’ll walk you through how to put together a metal bed frame and headboard in 5 easy steps. Whether you’re a seasoned DIY enthusiast or a complete beginner, these steps will help you assemble your bed frame with confidence.
If you’re looking for more inspiration beyond metal frames, Dream Lands Design has an excellent collection of DIY bed frame ideas, including a step-by-step guide on how to build a wooden bed frame. These diverse options allow you to choose the perfect style that suits your preferences and skill level.
Additionally, we understand the struggle of limited space in bedrooms. That’s why we highly recommend considering the amazing benefits of having beds with storage. Our friends at Dream Lands Design explain how these innovative designs offer optimal layout options while saving time and providing additional storage solutions in their insightful article.
Feel empowered to start your project using this guide as a reliable resource. Let’s dive into the process of creating a comfortable and stable bed frame that enhances your sleeping experience.
Step 1: Assembling the Bed Frame

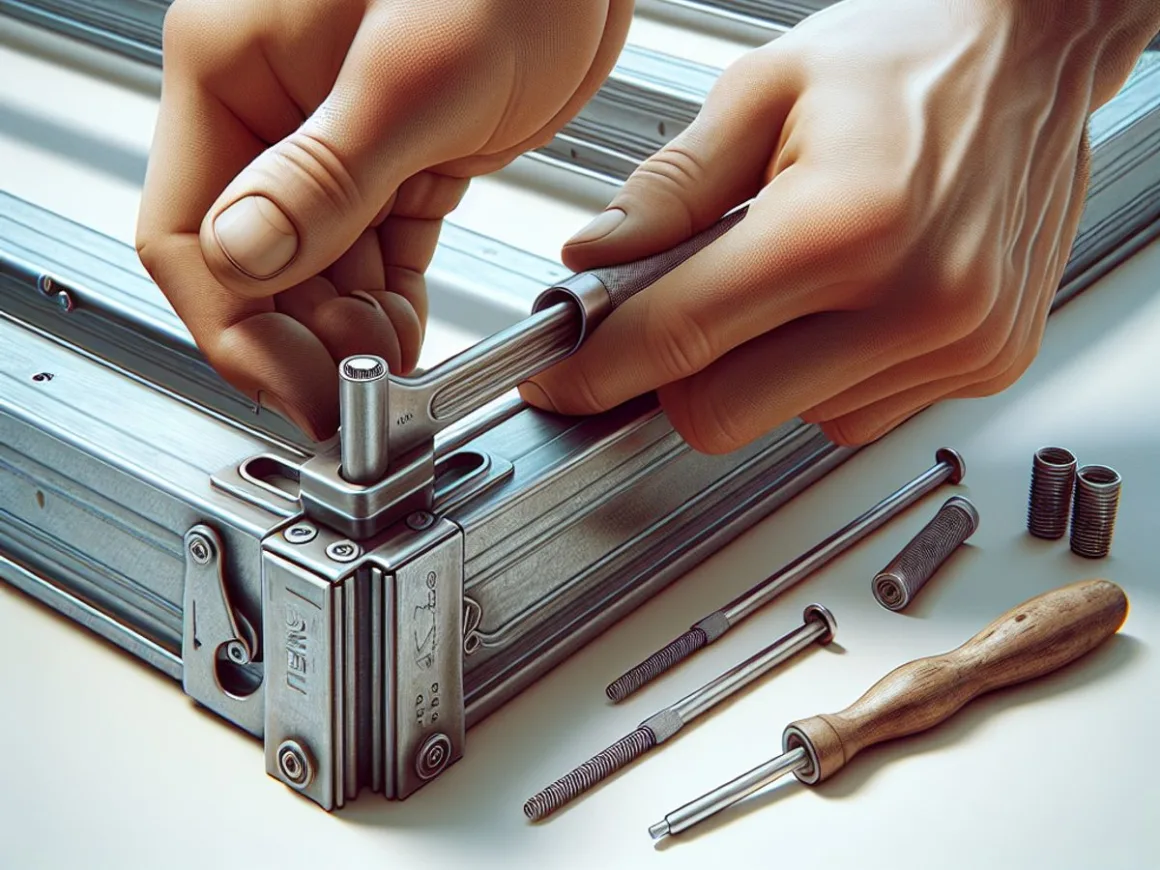
A typical metal bed frame consists of several key components:
- Side Rails
- Cross Arms
- End Caps
- Feet or Wheels
- Center Support Beam (if included)
Identifying and Preparing Components
Before starting the assembly, lay out all components on the floor. This helps in identifying each part and ensures nothing is missing.
Placing the Side Rails
- Position the side rails parallel to each other on the floor with proper spacing for the mattress.
- Ensure that the rails are aligned correctly to avoid any misalignment during assembly.
Attaching Feet or Wheels
Securely attach the feet or wheels to the corners of the bed frame. Most metal bed frames come with pre-drilled holes for easy attachment:
- Align the feet or wheels with the holes at each corner.
- Use bolts and nuts provided in the kit to secure them.
- Tighten all bolts using a wrench to ensure stability.
Extending and Positioning Cross-Arms
The cross arms provide lateral support and are crucial for stability:
- Extend the cross arms perpendicular to the frame legs.
- Attach them securely using screws or bolts provided in your kit.
- Ensure they are level and properly aligned.
Adding End Caps and Installing Center Support Beam
Some metal bed frames include end caps and center support beams for added stability. These components not only enhance the durability of your bed frame but also contribute to its aesthetic appeal.
End Caps
End Caps serve two primary purposes: protecting your floors from scratches and providing a finished look to the bed frame.
- Protection: End caps prevent the metal edges of the side rails from scratching or damaging your flooring.
- Appearance: They give a clean, polished finish to the ends of the side rails, enhancing the overall look of your bed frame.
To install end caps:
- Identify the Ends: Locate the ends of the side rails where the end caps will be attached.
- Snap Them On: Align each end cap with the corresponding end of a side rail.
- Secure Firmly: Press firmly to snap them into place as indicated in your assembly guide.
Center Support Beam
The Center Support Beam is particularly crucial for larger bed frames, such as queen or king sizes, as it provides additional support to prevent sagging and ensures even weight distribution.
1. Positioning: Place the center support beam centrally between the two side rails.
2. Securing: Attach it securely using brackets or screws provided in your assembly kit. Follow these steps for proper installation:
- Align Brackets/Screws: Position the brackets or screws at designated points along the center beam.
- Tighten Securely: Use a screwdriver or wrench to tighten all fasteners, ensuring that the beam is stable and properly aligned with the side rails.
Properly assembling these components ensures a sturdy base for your mattress and headboard, offering both stability and longevity.
Once you have assembled your bed frame, you can move on to the next steps of dressing your bed stylishly and choosing essential decorating accessories for your bedroom that complement your new bed frame.
Step 2: Attaching the Headboard

When it comes to attaching a headboard to your bed frame, it’s important to consider the type of headboard you have as they come in various types, each with its unique method of attachment. Some common types include:
- Panel headboards: These are typically attached using brackets or screws.
- Slat headboards: Often secured with bolts or screws.
- Bookcase headboards: Usually require a combination of brackets and screws for additional stability.
Aligning the Headboard
- Positioning: Place the headboard against the wall where the bed will be situated. Ensure it aligns with the center of the bed frame.
- Height Adjustment: Adjust the height of the headboard so that it fits seamlessly with the bed frame. This is crucial for achieving a polished look and ensuring stability.
Securing the Headboard
Brackets Method:
- Attach Brackets to Bed Frame: Locate pre-drilled holes on both the bed frame and headboard. Use bolts to secure brackets to these holes.
- Connect Headboard: Slide the headboard into place, aligning it with the attached brackets. Tighten bolts to secure.
Screws Method:
- Pre-drill Holes: If not already present, mark and drill pilot holes on both the frame and headboard.
- Align and Secure: Position the headboard against the bed frame, ensuring alignment with drilled holes. Use screws to attach securely.
Bolts Method (for heavier headboards):
- Insert Bolts: Place bolts through pre-drilled holes in both the bed frame and headboard.
- Tighten Nuts: Secure bolts with nuts, tightening them until the headboard is stable.
Ensuring Stability
After attaching, it’s crucial to ensure that the headboard does not wobble or tilt. It should stand firm when slight pressure is applied. You can use a level to check that it is perfectly horizontal.
Enhancing your bedroom setup by following these instructions ensures stability and satisfaction from assembling your own bed frame. For more tips on creating a tranquil bedroom setting, explore this guide which offers 5 essential tips for the ultimate tranquil bedroom.
Troubleshooting common issues like uncomfortable bedding can also enhance your sleep quality. Check out solutions here, which include ways to identify and solve problems with uncomfortable king-size fitted sheets, contributing to a more comfortable sleeping experience.
Step 3: Ensuring Stability and Safety

Choice of Mattress
The stability of your bed frame significantly depends on the type and size of the mattress. Selecting a mattress that fits snugly within the bed frame ensures even weight distribution, reducing the risk of wobbling or shifting. Common mattress sizes include:
- Twin: 38″ x 75″
- Full: 54″ x 75″
- Queen: 60″ x 80″
- King: 76″ x 80″
For optimal stability, ensure that the mattress dimensions match those specified by your bed frame manufacturer.
Aligning the Mattress
Once you have chosen the appropriate mattress, position it carefully within the bed frame:
- Place the Mattress: Lay the mattress flat on top of the assembled bed frame.
- Align Edges: Adjust the mattress so that its edges are flush with those of the bed frame.
- Check for Gaps: Ensure there are no significant gaps between the mattress and frame sides, which could lead to instability.
Proper alignment not only enhances stability but also prevents unnecessary wear and tear on both the mattress and frame.
Installing a Center Support Beam
For larger bed frames (e.g., Queen, King), a center support beam is crucial. This component distributes weight evenly across the frame, preventing sagging and enhancing durability.
Steps to install a center support beam:
- Identify Mounting Points: Locate the pre-drilled holes or brackets intended for the center beam on your side rails.
- Position Beam: Place the center support beam in these mounting points, ensuring it runs lengthwise down the middle of the bed frame.
- Secure Beam: Use screws or bolts to attach the beam securely to both side rails.
The center support beam should rest firmly on any legs or additional supports provided, creating a robust foundation for your mattress.
Additional Stability Measures
To further enhance stability and safety:
- Tighten All Screws and Bolts: Regularly check all connections to ensure they remain tight. Loose hardware can compromise structural integrity.
- Inspect for Wobbly Joints: Test each joint by applying slight pressure to detect any movement. Tighten as necessary.
- Add Felt Pads or Rubber Feet: Attach these to the bottom of your bed frame’s feet to prevent slipping and protect the flooring.
- Organize Storage Room: If you have limited space and need additional storage, consider implementing small bedroom closet storage solutions to keep your belongings organized without a closet.
- DIY Upholstered Headboard: Now that your bed is done, you can add a touch of elegance and comfort by creating your own upholstered headboard. This DIY project will further enhance the aesthetics of your bedroom.
Remember, a well-maintained bed ensures longevity and provides a secure sleeping environment.
Step 4: Common Challenges and How to Overcome Them
Encountering obstacles during bed frame assembly is not uncommon. Here are some typical challenges and effective troubleshooting tips:
Misaligned Holes
Misaligned holes can be a source of frustration.
- Tip: Use a rubber mallet to gently tap the pieces into alignment.
- Alternative: If holes remain stubbornly misaligned, consider using a drill to slightly enlarge them for better fitment.
Missing Hardware
Missing screws or bolts can halt progress.
- Tip: Always inventory hardware before starting the assembly.
- Solution: If you find items missing, check if replacements are available at a local hardware store or contact the manufacturer for replacements.
Difficulty Securing Headboard
Securing the headboard may present issues like wobbling or instability.
- Tip: Ensure all brackets and screws are tightly fastened.
- Additional Measure: Apply thread-locking adhesive to bolts for added security.
Cross Arms Not Locking Properly
Sometimes cross arms may not lock in place as expected.
- Tip: Double-check that cross arms are properly extended and positioned perpendicular to the frame legs.
- Adjustment: If needed, re-adjust the side rails to ensure proper spacing and alignment.
For readers looking to maximize bedroom space while dealing with these challenges, you might want to explore How to Create More Space in Your Bedroom. This resource provides valuable insights on how to get the most out of your available space, allowing you to overcome common challenges during bed frame assembly effectively.
Wobbly Joints
Wobbly joints can undermine bed stability.
- Tip: Tighten all screws and bolts using the appropriate tools.
- Checkpoint: Regularly inspect each connection point during assembly to identify any loose fittings early on.
If you’re interested in customizing your headboard, you can refer to How to Make a Headboard: 10 Unique DIY Ideas. These ten DIY headboard ideas are easy and economical to create, helping you fashion the bedroom oasis you’ve always dreamed of.
Addressing these common challenges effectively ensures a smoother assembly process and contributes significantly to the stability and longevity of your metal bed frame.
Step 5: Final Checks and Finishing Touches
Performing a Thorough Inspection
After assembling your metal bed frame and headboard, it’s crucial to perform a thorough inspection to ensure everything is secure and in place. Follow these steps:
- Check All Screws and Bolts: Ensure that all screws and bolts are tightly secured. Loose fittings can lead to instability and noise.
- Inspect the Joinery: Pay close attention to the joints where different parts of the frame connect. Look for any gaps or misalignments.
- Test for Stability: Apply gentle pressure to various parts of the frame and headboard. The structure should feel solid without any wobbling.
- Verify the Feet or Wheels: Ensure that the feet or wheels are firmly attached and level with each other. Uneven supports can cause rocking or tilting.
Optional Finishing Touches
Adding finishing touches not only enhances the appearance of your bed frame but also provides additional functionality:
- Felt Pads for Protection: Attach felt pads to the feet of the bed frame. This simple addition will protect your floor from scratches and make it easier to move the bed when needed.
- Decorative Caps: If your bed frame comes with decorative end caps, ensure they are securely attached. These add a polished look to your assembly.
- Headboard Covers: Consider adding a fabric cover to your headboard for a customized look that matches your bedroom decor.
To select the perfect bed that complements your sleep style, refer to our Ultimate Guide to Choosing the Perfect Bed for Your Sleep Style. This comprehensive guide discusses different sleep styles, what each style needs in a bed, materials, sizes, and other important factors to consider.
Additionally, if you’re planning to revamp your bedroom, we have 4 Things to Keep in Mind While Revamping Your Bedroom. This guide offers valuable suggestions that you must consider while changing the look of your beloved bedroom, ensuring a cohesive and inviting space.
Final Adjustments
Before placing your mattress, ensure that:
- The mattress aligns perfectly with the edges of the bed frame.
- Any center support beam is properly installed to distribute weight evenly.
- All components are re-checked for tightness after making any adjustments.
A well-assembled bed frame not only provides comfort but also contributes significantly to a good night’s sleep. By following these steps, you ensure both stability and longevity for your new bed setup.

Conclusion
Embarking on the journey to assemble your own metal bed frame and headboard offers several advantages:
- Cost Savings: By taking a DIY approach, you save on labor costs.
- Customization Options: Tailor the assembly process to fit your specific needs and preferences.
- Personal Satisfaction: There’s a unique sense of accomplishment in creating a sturdy, comfortable bed.
This guide has provided detailed steps to help you assemble your metal bed frame and headboard with confidence. Even if you are a beginner, these instructions ensure that the task is achievable.
Assembling your bed frame isn’t just about saving money; it’s about creating something uniquely yours.
Now, equipped with this knowledge, take the next step. Gather your tools, lay out your components, and start assembling your metal bed frame and headboard today.
FAQs (Frequently Asked Questions)
A typical metal bed frame consists of several key components, including side rails, feet or wheels, cross arms, end caps, and a center support beam.
Position the side rails parallel to each other on the floor to prepare for attaching them to the other components of the bed frame.
End Caps serve two primary purposes: protecting your floors from scratches caused by the metal frame and providing a finished look to the bed frame.
To further enhance stability and safety, tighten all screws and bolts, ensure proper alignment of the mattress, and consider installing a center support beam for larger bed frames.
If you encounter misaligned holes during assembly, use a rubber mallet or gently tap with a hammer to align them properly before inserting screws or bolts.
Performing a thorough inspection is crucial to ensure that all components are securely attached and that there are no wobbly joints or missing hardware that could compromise the stability and safety of the bed frame.


