Table of Contents Show
Introduction
Starting a DIY kitchen cabinet project can be a game-changer for your home improvement journey. Making your cabinets allows you to customize, save money, and feel satisfied in a way that store-bought options often can’t provide. With DIY kitchen cabinet plans, you can design every part of your storage space to fit your needs and style.
Why consider DIY kitchen cabinets?
- Customization: You have the freedom to choose everything from the type of wood to the finish, creating a space that reflects your taste.
- Affordability: Building affordable kitchen cabinets yourself is usually cheaper than buying pre-made ones, making it a great choice for homeowners on a budget.
- Personal Touch: There’s something incredibly rewarding about seeing your hard work come to life in a functional piece of furniture you’ll use daily.
Imagine having cabinets designed specifically for your kitchen layout and storage requirements. Whether you’re looking for sleek, modern designs or classic, rustic charm, DIY kitchen cabinet plans offer endless possibilities.
However, if you’re working with limited space, it’s essential to make the most out of every inch. Here are some tips for creating extra space in a small kitchen.
As you begin this project, it’s also important to know about the different choices available when selecting the right cabinets. This beginner’s guide to choosing cabinets for your kitchen and bathroom can offer helpful insights into the decision-making process.
Are you ready to start this exciting project? Check out our detailed guide and give your kitchen a makeover!
Understanding DIY Kitchen Cabinets
Tackling a kitchen renovation can be a daunting task, but choosing to build your own kitchen cabinets can provide significant benefits. DIY kitchen cabinets are not only a cost-effective option, but also offer unparalleled customization and satisfaction.
Definition and Benefits of DIY Kitchen Cabinets
DIY kitchen cabinets refer to cabinetry that homeowners construct themselves rather than purchasing pre-made units. These cabinets are typically built from scratch or assembled from kits, allowing for a tailored approach to fit any kitchen layout.
Benefits include:
- Cost Savings: Building your own kitchen cabinets can significantly reduce expenses compared to buying them pre-made.
- Customization: You have complete control over the design, size, and materials, ensuring the final product perfectly fits your needs and style.
- Quality Control: By selecting high-quality materials and using careful craftsmanship, you ensure durable and long-lasting cabinets.
- Personal Satisfaction: Completing a DIY project brings a sense of accomplishment and pride to your home improvement efforts.
Comparison Between Store-Bought and DIY Options
When deciding between store-bought and DIY options, consider the following aspects:
Store-Bought Cabinets:
- Convenience: Ready-made and often available for immediate installation.
- Limited Customization: These usually come in standard sizes and styles.
- Higher Costs: Often more expensive due to manufacturing and retail markups.
DIY Kitchen Cabinets:
- Flexibility: Fully customizable in terms of dimensions, design, and functionality.
- Budget-Friendly: Generally less expensive as you avoid labor costs.
- Time Investment: Requires time for planning, building, and installing.
Customization Possibilities in Design and Functionality
Custom kitchen design opens up endless possibilities:
- Materials: Choose from woods like oak, maple, or even eco-friendly options like bamboo.
- Finishes: Paint, stain, or seal your cabinets to match your kitchen’s aesthetic.
- Hardware: Select unique knobs, handles, and hinges to add personality.
Taking on a DIY cabinet project lets you design a space that suits your needs and showcases your personal style. If you’re thinking about a bigger makeover that goes beyond just the cabinets, learning about creating an authentic country kitchen can offer helpful ideas and inspiration.
Materials for Building Kitchen Cabinets
Choosing the right materials is crucial for your DIY kitchen cabinet project. One popular choice among DIY enthusiasts is plywood due to its durability and cost-effectiveness. However, it’s important to understand the differences between MDF and plywood to make an informed decision.
Common Materials Used for DIY Projects
Here are some common types of plywood used in DIY projects:
- PureBond Plywood: Known for its formaldehyde-free composition, making it an eco-friendly option.
- Hickory Plywood: Offers a beautiful grain pattern and is highly durable, ideal for a high-end finish.
- Birch Plywood: A versatile and strong option, often used in cabinetry for its smooth surface and excellent paint-holding capabilities.
Advantages of Using Plywood in Cabinet Construction
Plywood stands out as a preferred material for several reasons:
- Durability: It resists warping and cracking better than solid wood, ensuring your cabinets last longer.
- Cost-Effective: Provides a balance between quality and price, making it accessible for many DIYers.
- Versatility: Available in various grades and finishes, allowing customization to match any kitchen style.
- Eco-Friendly Options: Products like PureBond Plywood contribute to healthier indoor air quality by eliminating harmful chemicals.
Tips on Selecting the Right Material for Your Project
To ensure you pick the best material for your cabinets, consider these tips on selecting the right materials:
- Assess Your Needs: Consider whether you need a material that can withstand heavy use or one that offers aesthetic appeal.
- Check Grain and Finish: For visible parts of the cabinets, choose plywood with an attractive grain pattern like Hickory Plywood.
- Evaluate Thickness: Thicker plywood (such as 3/4 inch) is generally preferred for cabinet doors and shelves due to its sturdiness.
- Consider Environmental Impact: Opt for eco-friendly options like PureBond Plywood to contribute positively to your home’s environment.
By carefully selecting the right plywood type, you can create sturdy, beautiful kitchen cabinets tailored to your specific needs. Remember that choosing the right plywood can significantly impact the overall success of your project. Also, while solid wood has its advantages, veneer might be a better option in certain situations due to its versatility and cost-effectiveness.
Essential Tools and Equipment for Building Kitchen Cabinets
Creating your own kitchen cabinets can be a rewarding project, but having the right tools is crucial. Here’s a comprehensive list of what you’ll need:
Basic Woodworking Tools Required for Building Cabinets
- Tape Measure: Precision in measurements is essential.
- Pencil and Carpenter’s Square: For marking accurate lines.
- Clamps: To hold pieces together securely during assembly.
- Circular Saw: A versatile tool for making straight cuts in plywood.
- Jigsaw: Useful for cutting out shapes or making detailed cuts.
- Drill/Driver: Essential for drilling holes and driving screws.
Specialized Tools That Simplify The Process
While basic tools handle most tasks, specialized tools can significantly streamline your DIY kitchen cabinet plans:
- Kreg AccuCut: This track saw system allows you to make straight, accurate cuts with a circular saw.
- Pocket Hole Jig: Facilitates making strong, hidden joints easily.
- Router and Router Table: Useful for shaping edges and creating intricate details.
- Random Orbital Sander: Ensures smooth surfaces, are ready for finishing.
Safety Protocols When Using Power Tools
Safety should always be a priority when working with power tools. Here are some essential tips:
- Wear Safety Gear: Always use safety goggles, ear protection, and dust masks.
- Read Manuals: Familiarize yourself with the operation of each tool by reading the manufacturer’s instructions.
- Secure Workpieces: Use clamps to keep your materials stable while cutting or drilling.
- Keep Workspace Clean: A tidy workspace reduces the risk of accidents.
Using these tools effectively will help you bring your DIY kitchen cabinet plans to life efficiently and safely. Building kitchen cabinets can be complex, but with the right equipment and attention to safety, you’ll be well on your way to creating a beautiful and functional kitchen space. You might even consider building stunning DIY wood countertops to complement your newly crafted cabinets. Also, remember that it’s important to understand what age limit is appropriate for using tools such as screwdrivers or hacksaws, especially if you’re planning to involve younger family members in this project.
Planning Your Kitchen Cabinet Design with Efficiency in Mind
Creating a well-thought-out kitchen layout is crucial for achieving both functionality and aesthetic appeal. Efficient kitchen layout ideas focus on maximizing workspace, ensuring easy access to cabinets and appliances, and maintaining a logical flow.
Importance of an Efficient Kitchen Layout
An efficient kitchen layout improves your cooking experience, reduces clutter, and optimizes storage space. Here are some key considerations:
- Work Triangle Concept: The work triangle connects the stove, sink, and refrigerator—key areas where most kitchen activities occur. Ensuring these elements are within easy reach can streamline meal preparation.
- Proper Cabinet Placement: Positioning cabinets at convenient heights prevents unnecessary bending or stretching. Upper cabinets should be easily reachable while lower cabinets should have smooth drawers for quick access.
Measuring Kitchen Walls and Spaces
Accurate measurements are essential for planning your cabinet design. Here’s how to measure effectively:
- Wall Lengths: Measure the length of each wall from corner to corner.
- Ceiling Height: Note the height from floor to ceiling to determine the vertical space available for cabinets.
- Windows and Doors: Measure the height and width of windows and doors, including the distance from these openings to adjacent walls.
- Appliance Spaces: Measure spaces designated for appliances to ensure they fit seamlessly with your cabinet design.
Taking precise measurements ensures that your DIY kitchen cabinets will fit perfectly into your space, providing a custom look while enhancing functionality.
Additional Tips for Your Kitchen Makeover
If you’re considering a more extensive renovation beyond just cabinet design, several kitchen makeover ideas can breathe new life into your space.
Moreover, once you have your new cabinets in place, it’s essential to maintain an organized kitchen for optimal functionality. Implementing some kitchen organization secrets can significantly improve your cooking experience by reducing clutter and making it easier to find what you need.
Lastly, if you’re dealing with limited space, don’t worry! There are plenty of strategies available on how to optimize kitchen space that can help make your kitchen more user-friendly and efficient.
Inspiration Sources for Designing Your Dream Kitchen Cabinets
When designing your dream kitchen cabinets, it’s helpful to draw inspiration from a variety of styles and trends. Whether you prefer a classic look or a contemporary flair, there are numerous options to consider.
Popular Cabinet Styles and Their Characteristics
Here are some popular cabinet styles and their characteristics:
- Shaker Style: Known for its simplicity and clean lines, the Shaker style features recessed panel doors and minimal ornamentation. It’s versatile and suits both traditional and modern kitchens.
- Farmhouse: This style brings a rustic charm with distressed finishes, beadboard accents, and warm wood tones. It’s cozy and inviting, perfect for country-inspired kitchens.
- Modern: Sleek and streamlined, modern cabinets often have flat-panel doors with a high-gloss finish. They emphasize functionality and minimalism, creating a clutter-free space.
- Transitional: Blending elements of traditional and contemporary design, transitional cabinets offer flexibility. They typically feature simple lines with subtle decorative touches.
Incorporating Modern Aesthetics into Your Designs
Modern aesthetics can be seamlessly integrated into your kitchen cabinet designs through thoughtful choices in materials, colors, and hardware.
- Materials: Opt for materials like high-gloss acrylics or textured laminates to achieve a sleek look. Combining different materials such as wood and metal can add depth and interest.
- Colors: Neutral palettes like whites, grays, and blacks are staples in modern designs. However, bold colors such as navy blue or emerald green can make a striking statement when used thoughtfully.
- Hardware: Minimalist hardware like slim bar pulls or handleless designs contribute to a clean appearance. Consider using mixed metals (e.g., brushed nickel with matte black) for a sophisticated touch.
Popular Countertop Ideas to Inspire Your Kitchen Remodel
If you’re going the whole nine yards to spruce up your cabinetry and appliances, you may want to commit equal time to your countertops. Here are some popular countertop ideas that can complement your dream kitchen cabinets perfectly.
Creating a Functional Design for Your Kitchen Cabinets with Maximum Storage Capacity
Designing kitchen cabinets that are both functional and aesthetically pleasing is essential. Here are some tips to help you create a design that maximizes storage while maintaining style:
Enhancing Usability
- Full Overlay Doors: These doors cover the entire face frame, offering a sleek look and maximizing access to the cabinet’s interior.
- Adjustable Shelves: Incorporating adjustable shelves allows you to customize the storage space to fit various items, from tall cereal boxes to small spice jars.
- Toe Kicks: Adding toe kicks not only provides a comfortable standing position but also offers additional hidden storage space for smaller items.
Balancing Aesthetics with Practicality
Achieving the perfect balance between functionality and visual appeal requires thoughtful planning.
- Material Choices: Using materials like high-quality plywood ensures durability without compromising on style.
- Color Palette: Opt for neutral colors or natural wood finishes that complement your kitchen’s overall design while making the space appear larger.
- Hardware Selection: Choose handles and knobs that match the rest of your kitchen decor while being easy to grip and use.
Maximizing Space
Effective use of space is crucial in kitchen design.
- Corner Cabinets: Utilize corner cabinets with lazy Susans or pull-out trays to make the most of otherwise wasted space.
- Vertical Storage: Install tall cabinets that reach up to the ceiling for storing less frequently used items, keeping everyday essentials within easy reach.
Incorporating these features into your DIY kitchen cabinet plans will help you create a functional, stylish, and efficient kitchen.
Step-by-Step Guide to Building Your Own Kitchen Cabinets From Scratch
Building your own kitchen cabinets can be a highly satisfying experience. By following these instructions, you’ll create custom pieces that fit your space perfectly and reflect your style.
Planning Your Project
Before you start building, it’s important to plan everything out:
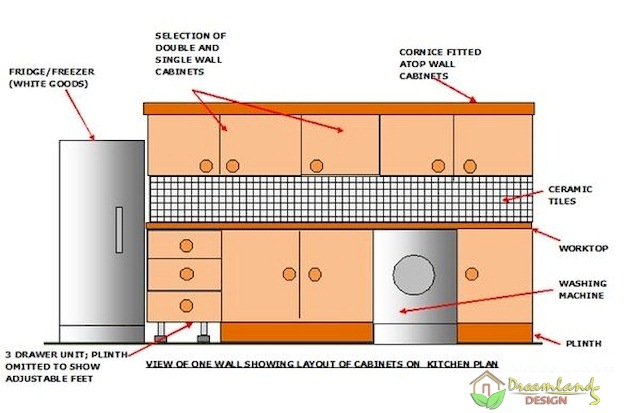
- Sketch Your Design: Create a detailed sketch of your desired cabinet layout, including both base and upper cabinets.
- Measure Accurately: Take precise measurements of your kitchen space to ensure a perfect fit.
- Gather Materials: Compile a list of all necessary materials and tools.
Building the Base Cabinets
The base cabinets are the foundation of any kitchen. Here’s how to build them:
1. Cut the Panels
- Use 3/4-inch plywood to cut out the sides, bottom, back, and shelves according to your measurements.
- Ensure all pieces are square and accurately sized.
2. Assemble the Frame
- Attach the sides to the bottom panel using wood glue and screws.
- Secure the back panel to the sides and bottom. This adds stability to the structure.
3. Install Shelves
- Measure and mark shelf positions inside the cabinet.
- Insert shelf pins or supports before placing shelves in position.
4. Edge Banding
- Apply edge banding to exposed plywood edges for a polished look.
- Use an iron to adhere to the banding, then trim the excess with a utility knife.
5. Add Durability with Back Panels
- Cut a back panel from 1/4-inch plywood.
- Attach it securely using brad nails or screws for added strength.
Constructing Upper Cabinets
Building upper cabinets is similar but requires precision to align with base units:
1. Cutting Dimensions
- Again, use 3/4-inch plywood for sides, top, bottom, and shelves.
- Ensure all cuts are precise to maintain uniformity.
2. Frame Assembly
- Begin by assembling the box structure: attach sides to the top and bottom panels with wood glue and screws.
3. Shelf Installation
- Mark shelf positions inside the cabinet box.
- Use pins or supports to hold shelves in place.
4. Edge Banding Application
- Apply edge banding to exposed edges as done with base cabinets for consistency in appearance.
5. Adding Backs for Stability
- Attach a 1/4-inch plywood back panel using brad nails or screws for additional sturdiness.
Making Additional Furniture Like Butcher Block Tables
While you’re at it, you might also consider creating additional furniture like a butcher block table which can be a great addition to your kitchen space. This article provides step-by-step instructions on how to construct such a table.
Finishing Touches
With both base and upper cabinets assembled, focus on the finishing touches:
- Sand all surfaces smooth.
- Apply primer and paint or stain as desired.
- Install doors, hinges, knobs, or handles according to your design plan.
By carefully following these steps, you’ll achieve professional-quality results that enhance both functionality and aesthetics in your kitchen.
Finishing Techniques that Will Make Your DIY Kitchen Cabinets Stand Out
Creating a remarkable finish for your DIY kitchen cabinets can elevate the overall look and feel of your kitchen. This section explores various finishing options and their impact on your cabinets’ durability and aesthetics.
Painting vs. Polyurethane Finishes
Painting:
- Color Choices: One significant advantage of painting your cabinets is the vast array of color choices. For a modern touch, consider Sherwin Williams Dorian Grey, which offers a sleek, contemporary look.
- Surface Preparation: Ensure you sand and prime the wood properly before applying paint to achieve a smooth, long-lasting finish.
- Maintenance: Painted surfaces may require touch-ups over time, especially in high-use areas.
Polyurethane Finishes:
- Durability: Applying polyurethane finishes like Minwax Helmsman Water-Based Poly provides a strong protective layer that resists scratches and stains.
- Natural Look: Polyurethane allows the natural beauty of the wood grain to shine through while offering excellent protection.
- Application: Apply multiple thin coats with light sanding in between for best results.
Importance of Sealing Finishes
Sealing your cabinet finishes is crucial to protect against daily wear and tear. Here are some reasons why sealing is essential:
- Protection Against Moisture: Kitchen environments are prone to moisture, which can damage wood over time. A good sealant prevents water penetration.
- Enhanced Durability: Sealed surfaces are more resistant to scratches, stains, and heat, extending the lifespan of your cabinets.
- Ease of Cleaning: Sealed finishes create a smoother surface that is easier to clean and maintain.
Steps for Applying a Polyurethane Finish
1. Preparation:
- Sand the cabinets thoroughly to remove any imperfections.
- Clean away dust and debris with a tack cloth.
2. Application:
- Stir the polyurethane gently to avoid air bubbles.
- Use a high-quality brush or foam applicator to apply an even coat.
- Allow each coat to dry completely before lightly sanding with a fine-grit sandpaper.
3. Final Touches:
- Apply at least two to three coats for optimal protection.
- Buff the final coat for a smooth, glossy finish.
Exploring these finishing techniques ensures that your DIY kitchen cabinets not only look stunning but also stand up to everyday use effectively.
Installing Your Kitchen Cabinets Like a Pro: A Step-by-Step Guide
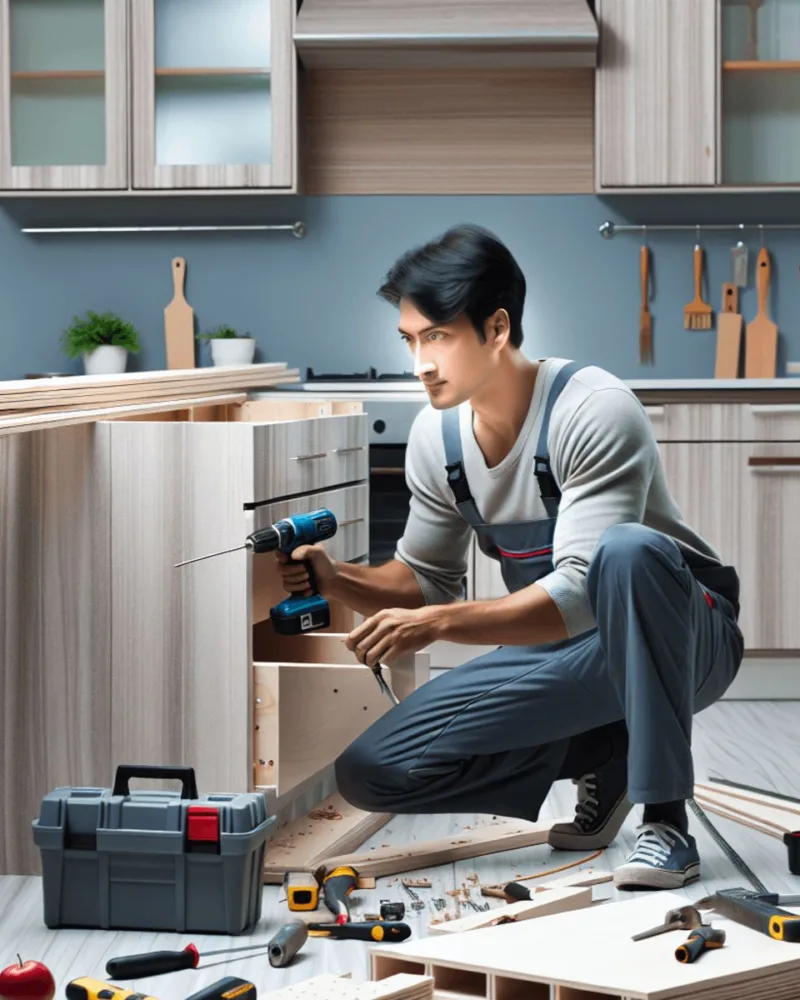
Preparing the Wall and Securing Base Units
Before you start attaching cabinets to walls, it’s essential to prepare the wall space. Begin by:
- Locating Studs: Use a stud finder to locate and mark the wall studs where you will secure your cabinets.
- Ensuring Level Surfaces: Check that your floors and walls are level. If they aren’t, make necessary adjustments as uneven surfaces can complicate alignment.
- Clearing the Area: Remove any obstructions and ensure the workspace is clean.
Now, you’re ready to secure the base units:
- Positioning Base Cabinets: Place your base cabinets against the wall, starting from a corner if possible.
- Shim for Leveling: Use shims under the cabinets to level them perfectly. This step is crucial for ensuring that countertops and upper cabinets align correctly.
- Securing to Studs: Drill pilot holes through the back panel of each cabinet into the wall studs. Use 2.5″ screws to secure each cabinet firmly.
Aligning Upper Cabinets Accurately
With the base cabinets in place, you can now focus on installing kitchen cabinets DIY-style for the upper units:
- Marking the Layout: Draw a horizontal line on the wall that marks where the bottom of the upper cabinets will sit. Make sure this line is level.
- Securing a Support Rail: Attach a temporary support rail along this line to hold the weight of the upper cabinets during installation.
- Hanging Upper Cabinets: Lift each upper cabinet onto the support rail and align it with your marks.
- Screwing into Studs: Secure each cabinet by drilling through its back panel into wall studs using 2.5″ screws.
Final Adjustments
Once all cabinets are secured:
- Double-check Levels: Ensure all cabinets are level and plumb.
- Adjust Doors and Drawers: Make necessary adjustments to ensure doors and drawers open smoothly and align correctly.
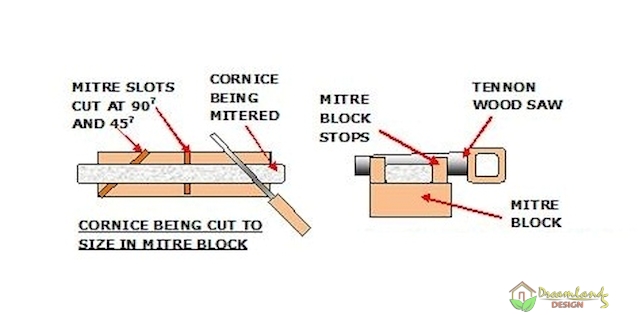
- Install Trim or Molding: Add any finishing touches like crown molding or trim pieces for a polished look.
Using these DIY kitchen cabinet plans allows you to achieve professional results while customizing your space efficiently and effectively.
Cost Efficiency of DIY Kitchen Cabinets: Are They Really Worth It?
Creating your own kitchen cabinets isn’t just a gratifying project—it can also be a cost-effective solution. Understanding where the costs lie will help you make an informed decision.
Breakdown of Costs: DIY vs. Pre-Made Options
DIY Kitchen Cabinets
- Materials: The cost of materials for DIY kitchen cabinets can vary significantly based on the type of wood and hardware you choose. For example, high-quality plywood sheets are typically priced between $50 to $100 each, while additional materials like screws, hinges, and handles might add another $50 to $100.
- Tools: If you don’t already own the necessary tools, there’s an initial investment to consider. Basic tools like a circular saw, drill, and clamps may set you back around $200-$400. Specialized tools can increase this amount but often pay off in future projects.
- Finishes: Paints or finishes for sealing your cabinets generally cost between $20-$50 per gallon, depending on quality and brand.
On average, building your own cabinets can cost anywhere from $300 to $600 per cabinet, including tools if you’re starting from scratch.
Pre-Made Kitchen Cabinets
Pre-made options come with convenience but at a premium price:
- Stock Cabinets: These are mass-produced and available off-the-shelf. Prices range from $100-$300 per linear foot.
- Semi-Custom Cabinets: Offering slightly more customization options, these typically cost between $150-$650 per linear foot.
- Custom Cabinets: Tailored to your exact specifications, custom cabinets can run from $500-$1,200 or more per linear foot.
Long-Term Savings Through Custom Builds
Investing your time and effort into DIY kitchen cabinets can yield substantial long-term savings:
- Durability: When built correctly using high-quality materials, DIY cabinets can outlast many pre-made options.
- Customization: Tailor every inch of your cabinetry to meet specific needs and preferences without paying the premium prices of custom builds.
- Maintenance and Repairs: Knowing the ins and outs of your cabinetry allows for easier maintenance and repairs down the line—saving additional costs on professional services.
By opting for a DIY approach, you have greater control over both the budget and quality of your kitchen cabinets.
Budget-Friendly Tips For Building Your Own Kitchen Cabinets Without Breaking The Bank!
When it comes to building your dream kitchen cabinets on a budget, a few strategic choices can make a significant difference. Here are some practical tips to help you get started:
Learn to Build from Scratch
Understanding how to build kitchen cabinets from scratch can save you a substantial amount of money compared to purchasing pre-made ones. Resources available online, such as finding affordable DIY kitchen cabinet plans, can provide step-by-step instructions that simplify the process.
Choose Cost-Effective Materials
- Plywood: Opt for plywood instead of solid wood. It offers durability at a fraction of the price.
- Hardware: Look for sales or bulk purchase options for your cabinet handles, hinges, and other hardware.
Efficient Use of Materials
Maximize the use of each sheet of plywood by planning your cuts carefully. This reduces waste and ensures you get the most out of every piece.
Repurpose and Reuse
Consider using materials from old furniture or reclaimed wood. Not only does this reduce costs, but it also adds a unique character to your cabinets.
Shop Smart
- Sales and Discounts: Keep an eye out for sales at local home improvement stores.
- Online Marketplaces: Platforms like Craigslist or Facebook Marketplace often have affordable materials and tools.
DIY Techniques
Learning specific techniques such as edge banding or how to build a kitchen cabinet base can enhance the quality of your cabinets without additional cost.
Modular Design
Build modular units like a kitchen pantry cabinet or individual base units. This approach allows you to spread out the cost and effort over time, making the project more manageable financially.
“Building your own cabinets not only saves money but also gives you complete control over design and quality.”
By following these strategies, you can create beautiful, functional kitchen cabinets without breaking the bank. The key is to balance cost-saving measures with quality craftsmanship, ensuring that your DIY efforts yield durable and aesthetically pleasing results.
Additionally, if you’re considering a more extensive renovation, here are 10 tips that could help you successfully remodel your kitchen into something beautiful without breaking the bank.
If painting your kitchen cabinets sounds more appealing than building new ones from scratch, understanding how to paint kitchen cabinets could be beneficial.
For those seeking budget-friendly kitchen makeover ideas, several options can help transform your space while keeping costs low.
Finally, if you’re drawn towards achieving an authentic country kitchen style on a budget, here are some helpful tips on attaining that rustic look without overspending.
Conclusion: Bringing Your Dream Kitchen To Life With Personalized Storage Solutions Through DIY Efforts!
Creating your dream kitchen is within reach, especially when you explore DIY kitchen cabinet plans. Crafting personalized storage solutions not only enhances the aesthetic appeal of your space but also meets your specific functional needs.
Consider diving into these plans today:
- Personalized Touch: Tailor every detail to reflect your style and preferences.
- Functionality: Design cabinets that maximize storage and improve kitchen workflow.
- Cost Efficiency: Save money by building rather than buying pre-made cabinets.
Building your own kitchen cabinets can transform a mundane space into a beautiful, functional area that’s uniquely yours. The journey of creating something with your hands adds immense value and satisfaction to your home improvement project.
Ready to start? Embrace the possibilities that cabinet DIY plans offer. Your dream kitchen is just a few steps away!
FAQs (Frequently Asked Questions)
DIY kitchen cabinets offer numerous benefits, including cost savings compared to store-bought options, the ability to customize designs and functionality according to your needs, and the satisfaction of creating something with your own hands. Additionally, they allow for greater control over materials and finishes.
Common materials for building DIY kitchen cabinets include various types of plywood, such as PureBond and Hickory plywood. These materials are favored for their durability and ease of use in cabinet construction. When selecting materials, consider factors like strength, appearance, and budget.
Essential tools for building kitchen cabinets include basic woodworking tools like a circular saw, Kreg AccuCut for precise cuts, clamps, a drill, and measuring tools. Specialized tools can simplify the process further. Always remember to follow safety protocols when using power tools.
An efficient kitchen layout is crucial for functionality. Start by measuring your kitchen walls and spaces accurately. Consider the workflow between key areas like the sink, stove, and refrigerator. Use this information to plan your cabinet placement effectively.
Finishing techniques can significantly impact the appearance of your DIY kitchen cabinets. Options include painting or applying polyurethane finishes like Minwax Helmsman Water Based Poly. Sealing finishes is important to protect against wear and prolong the life of the cabinets.
Yes, DIY kitchen cabinets can be more cost-effective than pre-made options. By sourcing materials yourself and investing time in building them from scratch, you may save money in the long run. Custom builds also allow you to tailor costs based on your specific design choices without compromising quality.

