When it comes to the various types of flooring available, there are some that are easier to install than others.
For instance, the work involved in a hardwood flooring installation is far more complicated and involved than that of, say, vinyl plank flooring.
While each flooring product brings with it its own distinct advantages and disadvantages, they do also vary in the difficulty of the installation.
Luckily, today we will be looking at the much less involved installation process of vinyl plank flooring.
This material offers advantages like lower cost, easier installation, and a wealth of colors and styles to choose from. But what is it about vinyl plank flooring that makes it so easy to install?

The Installation Advantage of Vinyl Plank Flooring
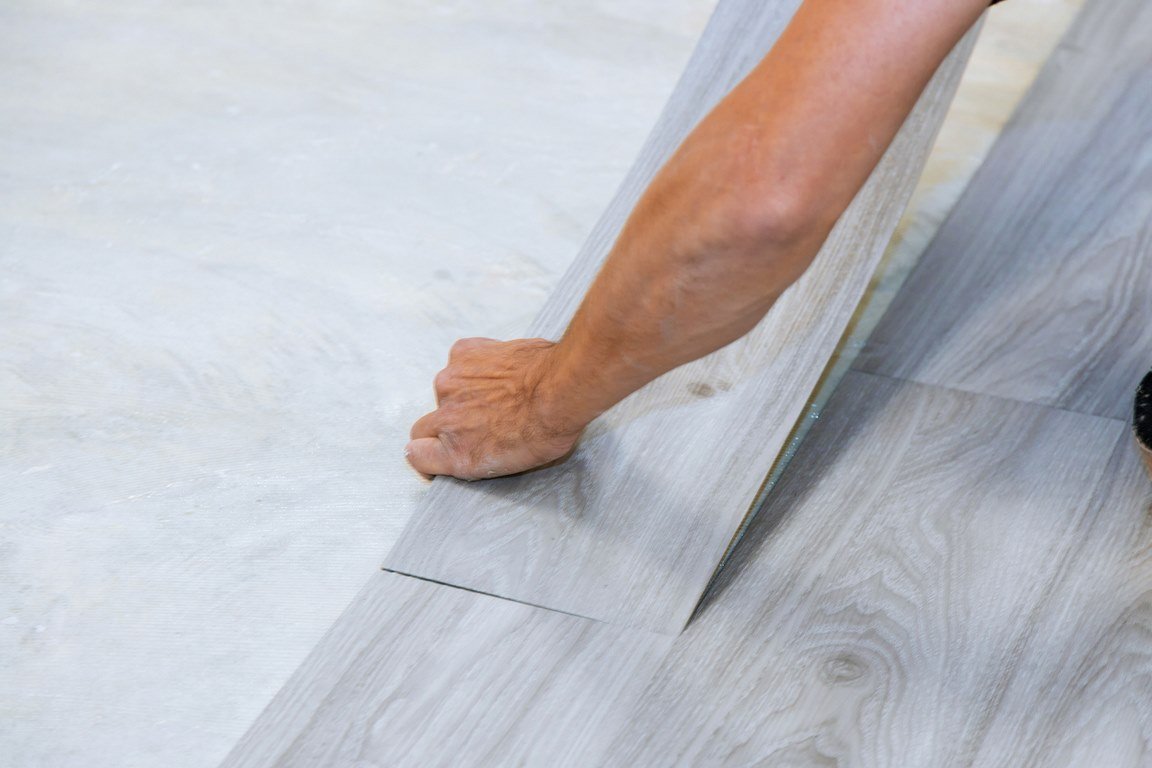
The main advantage of the material during installation is its design. Each edge of a plank has a special connection mechanism that makes linking multiple planks super easy.
It may look a little tricky at first, but as long as you remember to connect the long edge first, you’ll soon find yourself proficient in the process.
But we are getting a bit ahead of ourselves. Before we can start laying our vinyl plank flooring, we must first install our vapor barrier or underlayment.
This is a ready-made material available for purchase from your local hardware store (along with the tools and materials you’ll need for the vinyl plank installation) and can offer several benefits. While not all underlayments will have these features, most will:
- Act as a vapor barrier to prevent moisture from seeping up from the ground
- Act as a thermal barrier to retain heat during winter and let it flow freely during summer
- Act as a protective layer for your flooring to prevent scratching, damage, and premature wear
How to Install Underlayment
Before you install your floor’s underlayment, ensure you are working with a level surface.
This will reduce the likelihood of wear spots and other issues. You can use self-leveling materials and a bubble level to repair and find any uneven areas.
Once you are sure your floor is level, the next step is cleaning the ground to remove any debris.
Now you can lay your underlayment. This is a relatively simple process of unfolding the material across the length of your room.
You will likely have to cut the mats to size, which can be done by marking the spot where they touch the wall and cutting away the excess material.
Read Also:
How to Install Vinyl Plank Flooring
The installation process for vinyl plank flooring will vary depending on the manufacturer and product that you are installing, but they all follow the same general process.
The first thing to keep in mind is that the long side of the plank should run along the long side of the room.
Ideally, the first length should also run along an exterior wall, as these are more likely to be straight.
Then, simply lay your first set of planks. You will have to ensure they link up and lock together correctly at their matching sides.
When you are ready to move to the next row of planks, ensure you follow any manufacturer instructions regarding minimum distances between rows, as this will help ensure a stable and sturdy flooring system.
Repeat this process throughout the entirety of the room, and use a custom-cut piece of scrap material to cover the exposed edge under the doorway.
Remember, your most accurate information will come from the manufacturer’s instructions of your specific product, so be sure to use the included instructions for maximum effect and a great finished product.
