Table of Contents Show
Winter hits the home in different ways, dependent on where you live. Some winters pile up meter high and higher snow for months or provide gale-force rainstorms while some winters are mild and tropical. It all depends on where you live.
In this article I will focus on the cold winters of North America, where snow falls, temperatures can well go below the minus, and when it rains, it burns hard cold rain, sleet, and ice.

Insulate Doors for Winter
The garage is the most unprotected room in your home, and as such, if it is used for parking a car, storage or as a laundry room, you still don’t want to go into it in the freezing cold of winter.
In fact, even your car doesn’t want to sit there freezing. Cold is not a friend of oiled machinery and if your garage is to be used as a living space, insulating it and flooring it won’t mean a thing if the door is left untouched.
As such, it’s imperative to insulate your doors for winter, to assure your garage will be hospitable at any time of day or night.
Read Also:
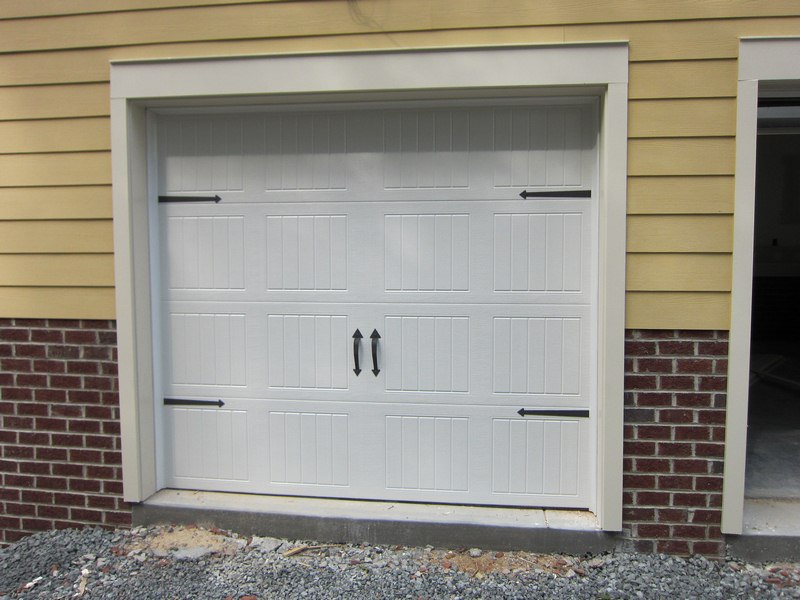
There are few garage door styles, but the most common are made of metal, such as steel or aluminum. Both these materials are poor insulators, and as such, one of the key components in securing a comfortable garage in the dead of winter or the middle of summer is to insulate the door.
Garage door insulation is not complicated, just demands some elbow grease. It also requires some DIY skills and a lot of patience. It also demands planning, as does any internal refurbishment project.
How to Insulate Your Doors for the Winter
Insulating a door is a standard followed by steps process, and I present to the basic steps to insulate a door.
- Check your door model, make and brand and check online if there is a perfect fit, not a universal one, a perfect bespoke kit for your door. If not, do not buy the closest universal fit kit.
- Measure your door, measure the various grids in the door, and just remember, a roll-up door is out of bounds. Do not insulate a roll-up door, either call in a professional or replace the whole unit.
- Tally up the measurements and buy foil lined polyester foam sheeting. Buy around 10% more than you really need to assure you have enough spare in case you miscut some pieces.
- Buy the foam polyester plates, usually come in rolls.
- Buy an adhesive you will use to attach the cutout plates to each section of the door.
- Buy a silicone sealant with application tools.
- Make sure you have a box cutter and steel ruler, with a marking pen.
- Wash the door properly before you intend to install the insulation. For big doors use a garden hose, after applying common house detergent with a sponge. The door must be completely clean and dry before application.
- Once you have assembled all these items, take the pen and mark the insulation sheet based on the exact measurements of the grid. If your door is one big piece, you might consider having a friend help you attach the whole plate. However, this is problematic, and it is better to cut the plate into four sections and adhere each section separately.
- Now take the box cutter and cut each section according to how you marked it. Cut all the sections, so everything is ready beforehand.
- Take the adhesive and smear it on the door.
- Take the correct plate, and with the foil side facing towards you, press it into the frame, with force if necessary, and pop it onto the surface. Apply an even pressure over all the plate so that it is stuck entirely along the door surface.
- Continue to do this until the door is totally covered.
- If you want, use duct tape to seal the connecting points, by placing it over the grid at the ridges.
- Now take the silicone sealant and seal the sides of the door, where the hinges or rails are located, and seal these locations along their meeting point with the garage wall.
You have now insulated and successfully sealed a garage door.
A Word on Garage Door Insulation Kits
For those that live in the colder areas of America, such as Michigan, Alaska, New England, etc., consider the following; a door insulation kit does not necessarily contain the best insulating materials and as such, might be a great shortcut to a quick installation.
However, if you want a bespoke installation using the best or highest insulating materials, its best to forgo a kit, and buy the materials as presented above.
If you do opt for a matador insulation kit, just make sure you have bought the correct one. You do this by checking your garage door make and model check its overall dimensions to be sure and compare these results with the specifications of the universal garage insulation kit.
Wood Doors
Insulating a wood door requires you start on the outside and use a wide waterproof fabric to connect between the door and the frame. This will stop the cold air from entering and allow you to open and close the door without problems. You do the same on the inside too.
For the upper and lower frames, you add a strip of wood between the door frame and the wall, ceiling and that will sit flush with the door when it closes, assuring its secure, and at the bottom you add a strip of polymer to lower door area that sweeps the floor as it opens and closes.
For insulating the door itself, you follow the same process as with a metal door, and just adhere insulation onto the wood surface, even painted surface is fine.
Conclusions
Insulating a door is not too much of a hard job, just make sure you buy enough insulation material, and remember, the floor of your garage is flush with the outside. Consider applying a ridge of rubber across the floor along the opening. The second option is to dig a small drainage channel across the door, to trap water. In both cases add the rubber barrier on the inside of the door, to make sure that rain or snow that piles up will not seep into the garage.


1 comment
Nice post very helpful. Keep it up