Table of Contents Show
A leaky tap isn’t just an annoying drip—it can significantly increase your water bills and cause long-term damage if ignored. While the problem often arises from worn-out washers, damaged seals, or corrosion due to frequent use, the good news is that most leaks can be fixed with some basic tools and guidance. Professional Plumber in Levittown are just a call away to assist with any plumbing issues if you live in Levittown or nearby areas.
Common Issues Leading to a Leaky Tap
Understanding the root cause of the problem is essential before diving into the solution. Below are some common tax-related issues:
- Dripping Taps: Often caused by worn-out washers or damaged cartridges.
- Low Water Pressure: Results from blockages or pipe issues.
- Noisy Taps: Caused by water pressure inconsistencies or loose parts.
- Corroded Taps: Typically, due to mineral buildup or aging.
Addressing these issues promptly ensures efficient water usage and prevents further damage.
Steps to Fix a Leaky Tap
1. Turn Off the Water Supply
Before attempting any repairs, ensure you turn off the water supply to the affected tap. You can do this at the valve under the sink or by shutting off the main water line. If the situation feels too complicated, calling an emergency plumber on Long Island can save you from potential water damage.
2. Dismantle the Tap
- Remove the decorative tap cover to access the screws.
- Use a screwdriver to carefully detach the handle.
- Unscrew the tap bonnet to access the washer, seal, or cartridge.
3. Inspect the Components
Check for signs of wear and tear:
- Washer: Check for wear and tear. Replace it with a new washer if damaged.
- Seal or Cartridge: Look for cracks or corrosion. Replace as needed.
4. Clean the Components
- Remove mineral deposits and debris using vinegar or a cleaning solution.
- Clean the tap body thoroughly before reassembly.
5. Reassemble and Test
Reattach the components and tighten them properly. Turn on the water supply and test the tap to ensure the leak is resolved.
DIY Tips for Tap Repair
While fixing a leaky tap is often straightforward, here are some additional tips to keep in mind:
- Tighten the gland piece on top of the valve if water leaks from the rod.
- Use appropriate tools like an adjustable wrench, pliers, and a screwdriver.
- Ensure the correct type of washer or cartridge is used based on the tap model.
If the issue persists despite your efforts, consulting a professional plumber is advisable.
Preventive Measures for Tap Maintenance
Regular maintenance can extend the life of your taps and prevent leaks.
- Clean taps regularly to avoid mineral build-up.
- Avoid over-tightening taps, as it can damage internal components.
- Replace washers and seals periodically to maintain efficiency.
When to Call a Plumber
Some tap leaks may be complex and require professional intervention. Call a plumber if:
- The leak persists despite replacing washers and seals.
- The tap is corroded or excessively damaged.
- You’re unsure of how to proceed with repairs.
For residents in Levittown, professional plumbers are just a call away. They can address tap leaks, pipe issues, and other plumbing concerns efficiently.
Essential Services
- Tap and Leak Repairs: From kitchen taps to bathroom fixtures, ensure all leaks are resolved.
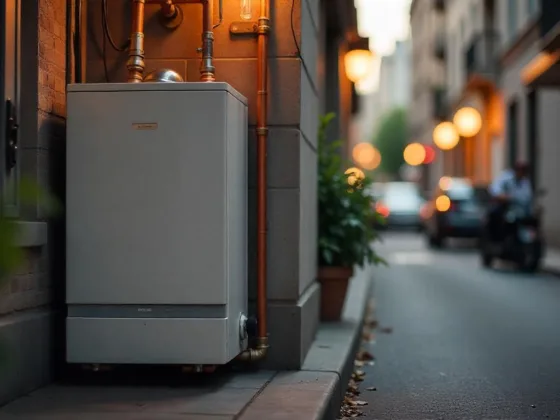
- Boiler Installation and Repair: Certified technicians ensure safe and efficient installations.
- Drain Cleaning and Repairs: Prevent clogs with professional cleaning and maintenance.
Conclusion: Say Goodbye to Dripping Taps
A leaky tap may seem minor, but it can waste water and increase bills if left unattended. By following the steps above, you can fix the most common leaks yourself. For more complicated issues, don’t hesitate to contact a licensed plumber. Regular maintenance and timely repairs will keep your plumbing system in top condition for years to come.
Find a Trusted Plumber in Your Area
Are you looking for a good plumber? Try searching! Find a plumber who will solve all your problems. To keep your system working look for a plumber right from repairs to installations. Essential is the work done by a plumber. Plumbing is even essential for workplaces.
Plumbing services also provide top-notch cooling and heating services. Plumbers are required to run your systems smoothly. Plumbers need to work according to the unique needs of clients. Serving promptly is essential from the plumber’s end. You can look for a plumbing company that can be a roof solution.
Services provided by a Plumber
- Tap and Leak Repairs: Need kitchen or bathroom tap repair? Call a nearby plumber and get your bathroom and kitchen in working condition.
- Boiler Installation and Repair: Here repair and installation are done. Get to see that all the technicians are certified.
- Plumbing Services: Get fast and reliable services from a nearby plumber. Find the plumbers who get your job done right.
- Drain Cleaning and Repairs: Get ready to replace your drain if blocked. It includes from drain cleaning to burst pipe repair.
What Should Be the Factors to Be Considered While Choosing a Plumber
- No Overtime charges
- Locally owned and serving
- Parts used guaranteed
- Good customer service
- Licensed and insured
- Flexible appointment times
1. Where is my main water pipe?
Your main pipe is usually easy to find. It’s the place in the home where all water distribution begins, and it’s also the point at which you can control whether water flows into your house or not.
2. Why do I get a high water bill?
If there is a leak in your tap you may get a high-water bill. Through careful observation, you can find out where the leak is.
3. How to solve the problem of clogged drains?
There can be a reason for clogged drains such as soap, and hair get accumulating. If the pipe’s diameter is very small it can also be a problem. How often we use sinks and shower clogging is also dependent upon that. Though we take precautions not to happen this still happens. If we use dish soap it can be minimized. If we use vinegar, it can break the clog.
4. While going on vacation do I need the water system to be turned off?
Yes, it can save you from headaches.
Infographic

Tips for Choosing a Plumber
- Licensing and Insurance: Always choose a plumber who is insured and licensed.
- Emergency Services: For urgent repairs and installations, you can call a plumber.
- Experience: Check whether a plumber has experience in a specific area.
- Reputation: To trust a plumber, you can take the help of online reviews.
- Transparent Pricing: Before starting work just talk about money.
- Guarantees: Ask whether on labor and parts is there any warranty.
If you are looking for a plumber near you can look for a “plumber near me”. Find out the plumber who is transparent. It is also essential that a plumbing company is reasonable. Look for the plumber in your area.
FAQs
You will typically need an adjustable wrench, screwdrivers (flathead and Phillips), replacement washers or O-rings, and plumber’s tape. Having a cloth or sponge handy to catch water is also advisable.
The most common causes of a leaky tap include worn-out washers, damaged O-rings, or a faulty valve seat. Turn off the water supply, disassemble the tap, and inspect these components for wear and tear.
Many leaky tap issues can be resolved by homeowners with basic DIY skills. If you’re comfortable with tools and following instructions, you can fix it yourself. However, if the problem seems complex or you are unsure, hiring a plumber is advisable.
Locate the shut-off valves under the sink. Turn them clockwise to shut off the water supply. If there are no individual shut-off valves, you may need to turn off the main water supply for your home.
If replacing washers and O-rings does not resolve the leak, the issue may be with the valve seat or the entire tap assembly. In such cases, consider replacing the valve seat or the tap itself, or consult a plumber for assistance.
Regular maintenance, such as checking for wear on washers and O-rings, using the tap gently, and ensuring proper installation, can help prevent leaks. Additionally, consider using high-quality components when replacing parts to enhance durability.
