Table of Contents Show
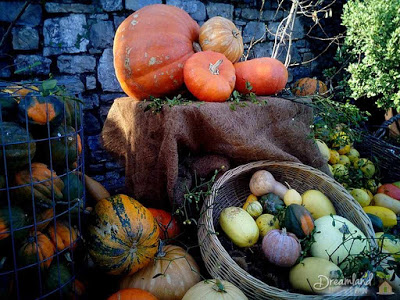
These mild-flavored gourds can be divided into two chapters: summer squash and winter squash. Summer squashes – zucchini, yellow crookneck, yellow summer squash, pattypan – contain soft seeds beneath their thin, edible skins. These varieties don’t need long to cook, thanks to their tender flesh and high water content.
As the moniker suggests, summer squash are at their brightest from early until late in the summer season, and can be prepared by frying, baking, steaming and sautéing. Acorn, butternut, spaghetti and turban are just a few of the best-loved winter squashes grown throughout the warmer months.
These slow-growing gourds are at their best beginning in early fall and on through winter. Winter squash varieties hide their firm flesh under thick, tough skins and require longer cooking time. Remove the seeds and these robust gourds are ready to be simmered, steamed or baked.
- Seasons of growth: Squash are warm season vegetables. Summer squash differs from that of winter in that it is harvested while still immature. Winter squash isn’t eaten until a hard rind has developed and the seeds within the squash have matured.
- Frost tolerance: Squash do not tolerate frost well and should only be planted after all danger of frost has passed.
- Plant Height: 1-2 feet tall
- Plant Width: 3-15 feet wide (winter), 3-10 feet wide (summer)
Planting Squash
- Plant Spacing: Place 4-6 seeds in mounds 4 feet apart. Thin plants when they have developed 2 leaves, leaving two plants to a mound. Transplants should be placed in mounds 2 feet apart, in rows 4-6 feet distant from one another. Root damage will slow growth and establishment and should be avoided.
- Germination Requirements: Seeds should not be sown until soil temperatures have reached at least 65°F.
- Best establishment method: Although transplanting squash is possible, these plants are typically grown from seed.
Cultivation and Harvest
Water Requirements
Irrigate with 1-2 inches of water each week, watering deeply but infrequently. To avoid fruit rots, reduce water supply as they ripen.
Fertilization Requirements and Recommendations
Once winter squash have developed runners, apply a side dressing of nitrogen-based fertilizer (21-0-0), using 1-2 tablespoons for each mound. Place fertilizer 6 inches from each plant and water in well. After summer squash have begun to flower, it is recommended to use the same fertilization schedule used on winter squash. Of course, the organic approach can be implemented as well. Start by incorporating 2-4 inches of compost into your garden prior to planting.
For summer squash, follow up with an additional compost application of 2-4 inches at 6 weeks after planting. Winter squash need more nutrients to fully ripen their fruit. Make subsequent compost applications at 6, 10, and 14 weeks after planting. These later applications can be difficult to apply due to the sprawling vine. Try your best and ask a friend or family member for help. Remember to always work compost gently into the soil around plants to avoid rood damage.
Days to Harvest
Summer squash varieties generally flower 35-45 days after seeding and are generally harvested 3-5 days after each female flower opens. If left on the vine too long, the skin will toughen as the squash’s quality diminishes.
Summer squash bruises easily and should be handled gently. Winter squash will be ready for harvest approximately 45-55 days after the plants begin to flower. When winter squash has reached full color, the rind is hard and unaffected by a scratching fingernail and the vines begin to die back they are ready to harvest. Remove winter squash with the stem still attached.
To avoid contamination from viruses, first target and control the aphids that carry them (see insects and control), and be sure to destroy plants that have been infected. Squash can suffer from wilt diseases, which can cause leaves to wilt and may kill the plant. Check stems for gummy exudates or slime formation, and treat for a specific wilt disease only after it has been identified.
Powdery Mildew disease can be identified by the white fungal patches that appear on more mature leaves. The disease causes leaves to die, overexposing vegetables to the sun. To avoid, plant varieties resistant to the disease and use drip irrigation.
Insects and Control
Squash may attract the interests of aphids, squash bugs and/or cucumber beetles. To control an aphid infestation, dislodge with a strong stream of water and utilize appropriately labeled insecticidal soaps. Squash bugs are Grey or brown and attack the leaves by sucking the sap from them. If squash bugs are present, leaves will appear speckled before they wither and die. Remove bugs and their small, copper colored eggs from the underside of the leaves.
A strong stream of water will dislodge the bugs but the eggs will need to be squished between your fingers for an easy organic approach. As an alternate method, you can lay any practical sized scrap board flat on the ground near your plants. These insects love to hang out in warm, dark, and moist environments. A few days after laying out your wooden traps, turn them over and squish any squash bugs and eggs that have taken refuge under the board.
This practice can be continued all season if needed. A word of warning to those with sensitive noses: the squash bug is basically what is known as a stink bug. The pungent odor of squished adults can be quite repulsive at times. Controlling cucumber beetles – which can be identified by their stripes or spots – can be controlled with any material targeting the insect and labeled for use on squash.


